One of the most important features of Timbeter is the Storage Module, which offers users a number of possibilities for reporting, inventory management and storage control.
We always encourage our users to log in at https://timbeter.com and explore the Storage Module. You’ll be able to see all measurements made with Timbeter, and in addition to editing the measurements, you’ll also have access to different functions to make your work more efficient and accurate.
If you would like to know more, here are several reasons to start using the Storage Module right now.
One of the most commonly used functions in the Timbeter Storage Module is reporting, which can be easily shared with your team, contractors and other important personnel in the production. To start creating a report through Timbeter is simple, you should follow just a few steps:
1 – Create a wood assortment through the Storage Module

For adding new wood assortment following information is required: wood type, wood quality, log length and price.
2 – Check the wood assortment on the device
If the Wood assortment has been added, the selection will also appear in the device. You now can select it accordingly.
3 – Select “Reports” from the upper menu and click on “New report”.
This is the main step to set the measurements which will be available in the report. Make sure there are no duplicates or reports from a different source added to it. Enter the name of the report and select the formula that is used for calculation. Please take note that reports can be made only using one type of measurement, i.e. if you are only measuring the diameters.

4 – Add measurements to the report
To add measurements to the report, go to the Dashboard and select measurements by ticking the box.

Then, select the report where measurements will be added.

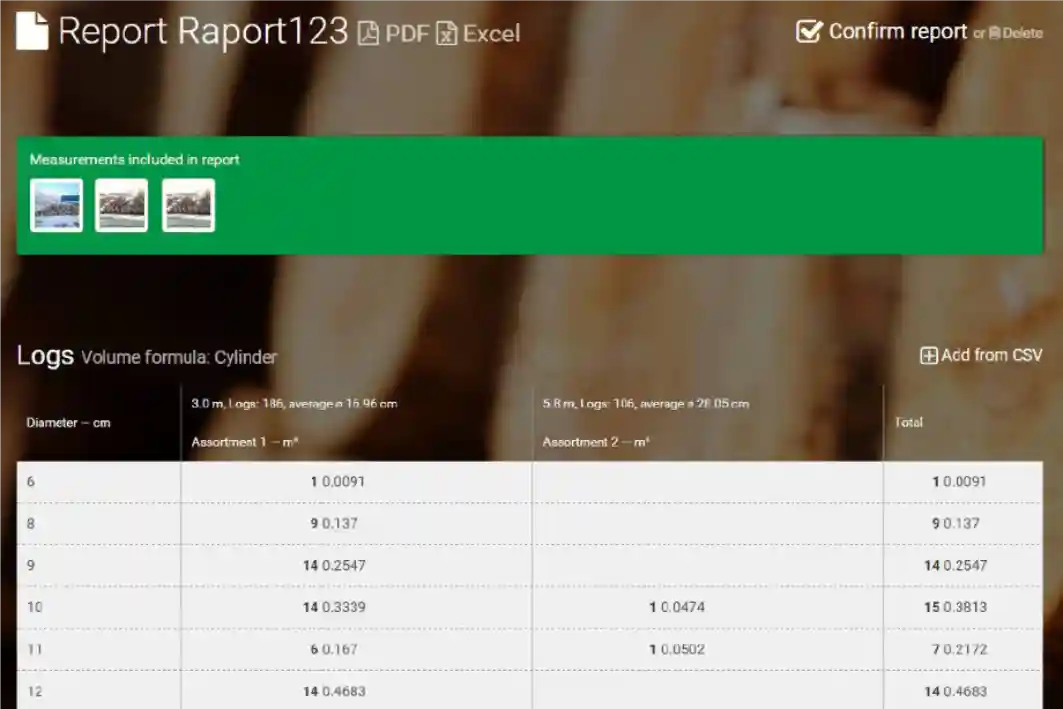
When the measurements have been added to report, users can see the status of the reports by selecting from the upper menu once again in “Reports” and clicking on the report’s name. All the measurements selected to the report will appear. If there’s a need to add manual measurements to the report there’s a possibility for that. Select Add CSV and upload the CSV file. The CSV file needs to be in a correct format – meaning that numbers must be integer.


In the end, the system generates an automatic summary. Report can be printed in PDF format by clicking on the PDF icon.

Now you are ready to start sharing the reports. Make sure the measurements are in the same assortment and get the best of our Storage Module features.
Do you want to start using Timbeter? Get in contact with our team to have a free trial.